
🍓 Getting Started with Raspberry Pi [04] Editing Raspberry Pi Files from VS Code on a Work PC via SSH
Getting Started with Raspberry Pi 4
- [01] Hardware Setup
- [02] Installing Raspberry Pi OS
- [03] Initial Setup and Basic Checks
- [04] Editing Raspberry Pi Files from VS Code on a Work PC via SSH
- [05] Setting Up a Python Environment
- [06] Connecting from Raspberry Pi to a Local LLM
- [07] Trying Ollama and Lightweight Models on Raspberry Pi
👀Table of Contents
- 🌱 The first step toward turning Raspberry Pi into a small development machine
- 🛠️ Installing Remote-SSH
- 🔗 Connecting to Raspberry Pi from VS Code
- ✅ Checking the connection
- 🐍 Running a Python program
- ✍️ Summary
🌱The first step toward turning Raspberry Pi into a small development machine
Up to the previous article, I finished the initial setup of the Raspberry Pi 4 and checked that the basic operation was working.
However, keeping a keyboard, mouse, and monitor connected directly to the Raspberry Pi while working is a little inconvenient as a development environment. It also increases the amount of equipment on the desk and can quickly take up workspace.
So this time, I will connect to the Raspberry Pi from VS Code on my work PC via SSH, and make it possible to edit files on the Raspberry Pi directly.
With VS Code Remote-SSH, I can keep using VS Code on my work PC, while the actual file editing and terminal operations happen on the Raspberry Pi side. It looks like the usual VS Code, but the files being opened and the commands being run are all on the Raspberry Pi.
🛠️ Installing Remote-SSH
First, install the Remote-SSH extension in VS Code on the work PC.
Open the Extensions icon on the left side of VS Code, then type Remote-SSH into the search box.
Select the Remote-SSH extension that appears and install it.
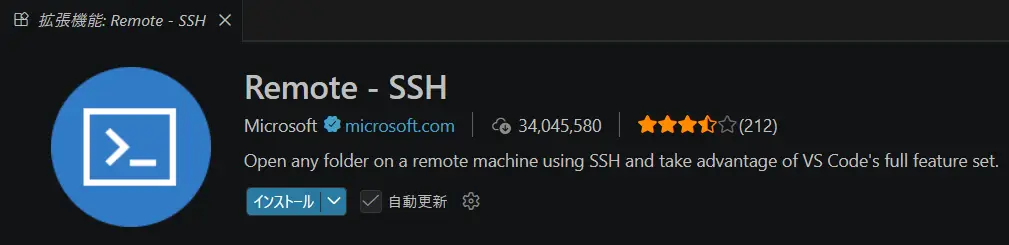
That completes the installation.
On the Raspberry Pi side, there should be no problem as long as SSH is already enabled from the previous setup.
🔗 Connecting to Raspberry Pi from VS Code
After installing Remote-SSH, try connecting to the Raspberry Pi from VS Code.
Click the blue ><-like icon in the lower-left corner of VS Code.
From the menu that appears, select the following item.
Remote-SSH: Connect to Host...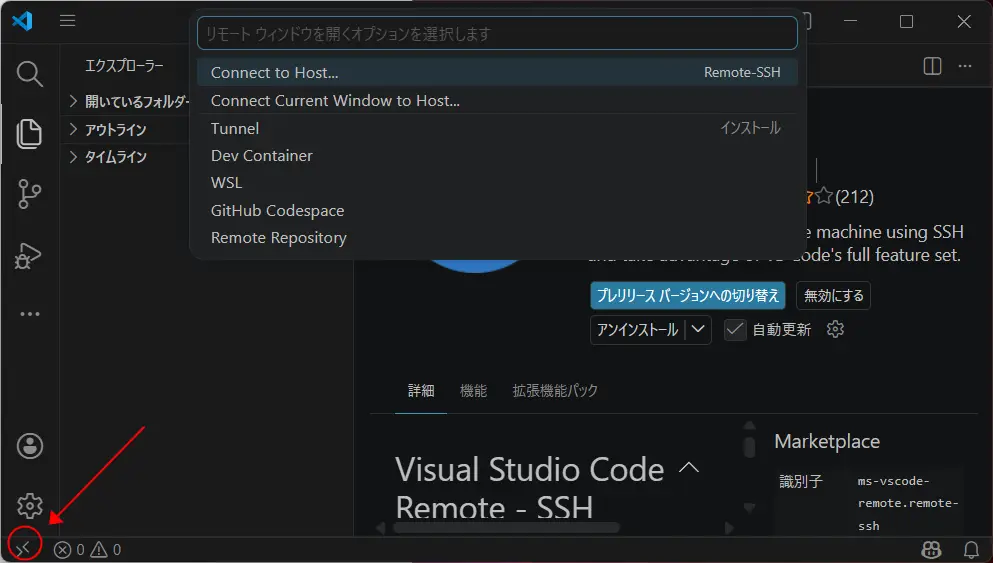
If the connection target has not been registered yet, select Add New SSH Host....
Enter the SSH connection command as follows.
ssh your-ID@hostnameReplace your-ID and hostname with the values for your own environment.
For example, if the user name is pochomlab and the host name is pichom, the command will be as follows.
ssh pochomlab@pichomNext, select the SSH configuration file to update.
On Windows, it is usually located somewhere like this.
C:\Users\your-ID\.ssh\configOnce registration is complete, the host name you registered will appear in the command palette.
hostnameWhen you select the connection target, VS Code asks for the type of remote host.
Select the platform of the remote host "hostname"Since this connects to Raspberry Pi OS, select Linux.
After that, enter the Raspberry Pi password.
your-passwordOn the first connection, VS Code Server will be downloaded automatically to the Raspberry Pi side.
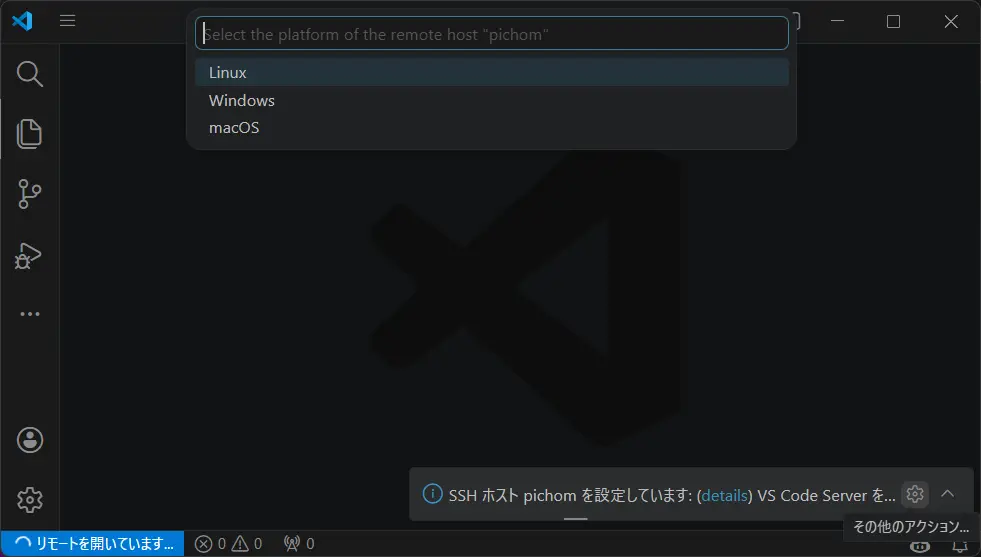
After waiting a little, the connection will complete.
Once connected, the host name of the connection target appears in the blue icon area at the lower-left corner of VS Code.
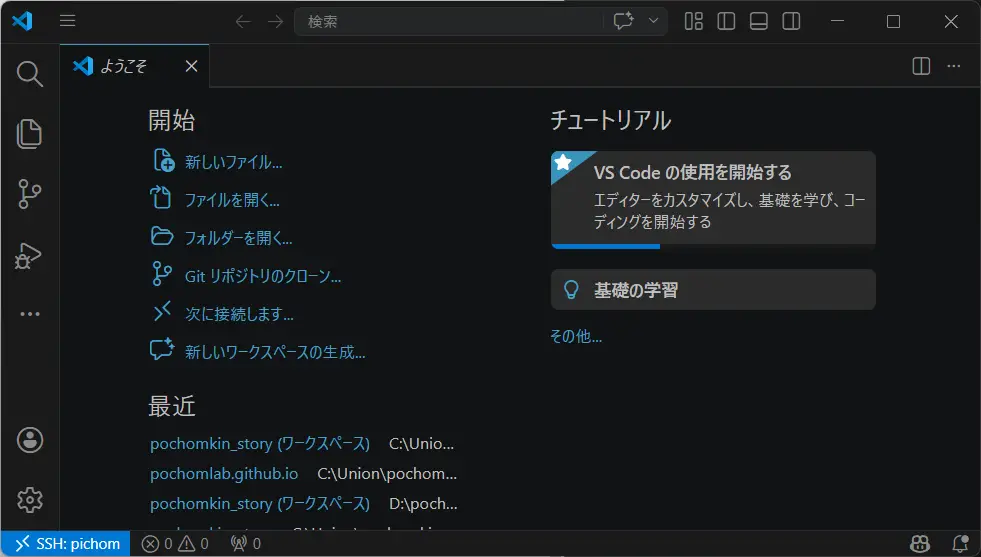
Now VS Code on the work PC is connected to the Raspberry Pi.
✅Checking the connection
Opening a folder
Once connected, try opening a folder on the Raspberry Pi side from VS Code.
From the menu, select the following.
File → Open FolderFirst, try opening the home directory.
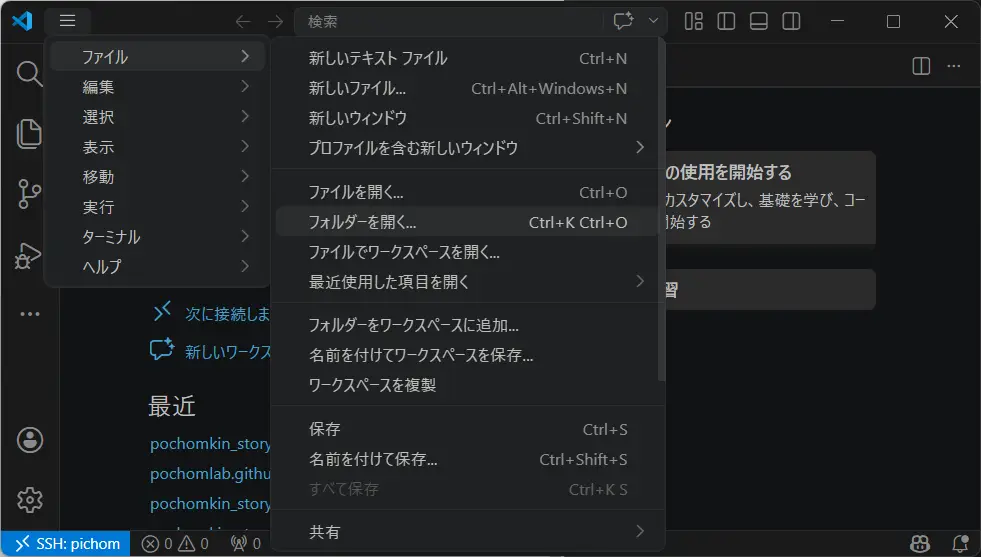
When opening a folder, a confirmation message like the following may appear.
Do you trust the authors of the files in this folder?This time, it is the home directory on my own Raspberry Pi, so I select the following.
Trust Folder and ContinueEnter the Raspberry Pi password if necessary.
your-passwordNow the Raspberry Pi home directory appears in VS Code.
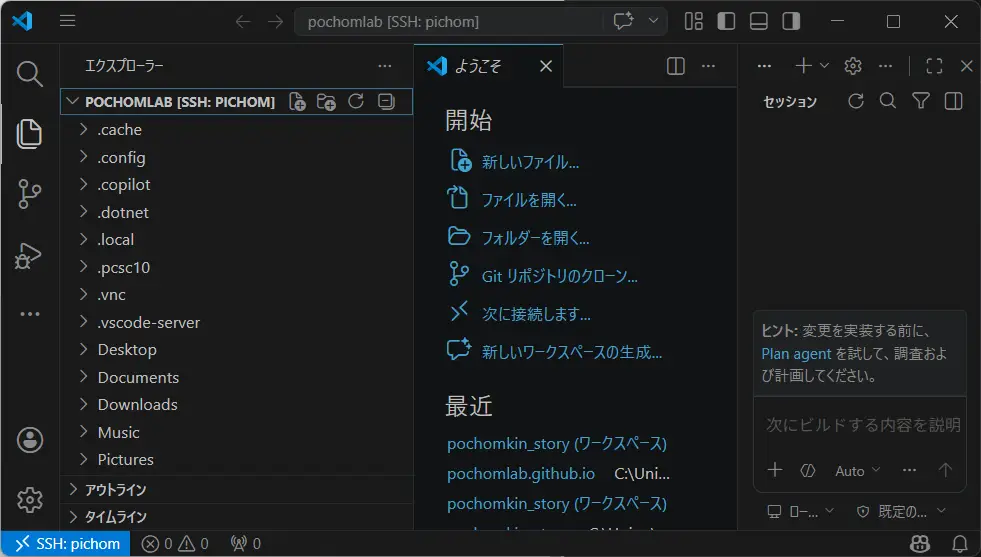
Running commands
Next, open the VS Code terminal and check whether commands are actually being run on the Raspberry Pi side.
Run the following commands.
pwdhostnamepython3 --version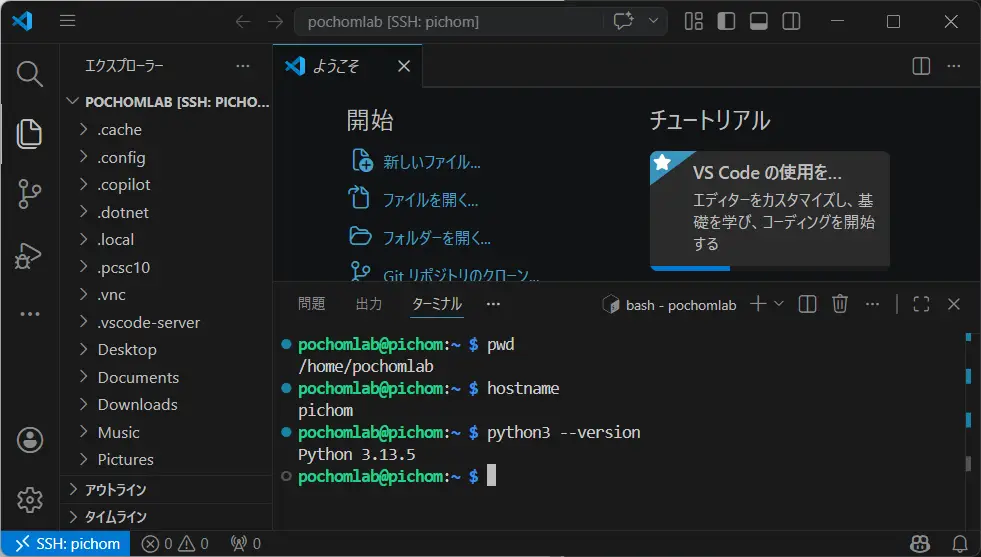
If pwd shows a directory on the Raspberry Pi side, and hostname shows the Raspberry Pi host name, then the terminal is operating on the remote machine.
Also, if python3 --version displays the Python version, Python on the Raspberry Pi side is being recognized correctly.
At this point, even though I am using VS Code on the work PC, the files being opened and the terminal being used both exist on the Raspberry Pi side.
This is really convenient.
🐍 Running a Python program
Finally, create a simple Python program from VS Code and run it on the Raspberry Pi side.
First, create a test folder under the home directory.
mkdir pochomlab-pi-testsOpen the folder you created, then create a new file named hello_pi.py.
/home/pochomlab/pochomlab-pi-tests/hello_pi.pyKeep the file contents simple for the first test.
print("Hello from Raspberry Pi via VS Code Remote SSH!")After saving the file, run the Python file from the VS Code terminal.
cd pochomlab-pi-tests
python3 hello_pi.py
If the following output appears, the test is successful.
Hello from Raspberry Pi via VS Code Remote SSH!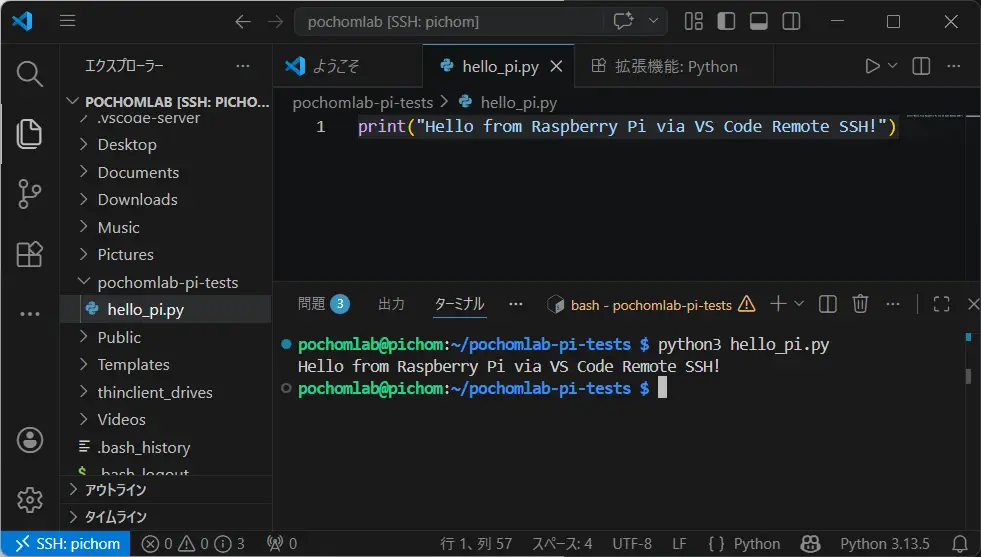
This confirms that I can create a Python file on the Raspberry Pi from VS Code on the work PC, then run it directly on the Raspberry Pi side.
✍️ Summary
This time, I connected to the Raspberry Pi from VS Code on my work PC using Remote-SSH, and confirmed that I could edit and run files on the Raspberry Pi side.
Once this is working, the Raspberry Pi becomes much easier to use as a small experimental PC.
Instead of connecting a keyboard and mouse to the Raspberry Pi every time, I can edit files directly from the work PC I normally use, which makes the development flow much smoother.
Especially for future experiments such as Python testing or connecting from the Raspberry Pi to the local LLM running on the main PC, this Remote-SSH environment will likely become an important foundation.
Next time, I will move on to setting up the Python environment on the Raspberry Pi.