
🍓 Getting Started with Raspberry Pi [03] Initial Setup and Basic Checks
Getting Started with Raspberry Pi 4
- [01] Hardware Setup
- [02] Installing Raspberry Pi OS
- [03] Initial Setup and Basic Checks
- [04] Editing Raspberry Pi Files from VS Code on a Work PC via SSH
- [05] Setting Up a Python Environment
- [06] Connecting from Raspberry Pi to a Local LLM
- [07] Trying Ollama and Lightweight Models on Raspberry Pi
👀Table of Contents
- 🔰 Initial Setup
- 🔒 Trying an SSH Connection
- ⬆️ Updating Package Information
- 💻 Setting Up Remote Desktop Connection
- 📺 HDMI Settings
- ✍️ Summary
🔰 Initial Setup
In the previous article, I finished installing Raspberry Pi OS.
This time, I will continue from there and go through the initial setup.
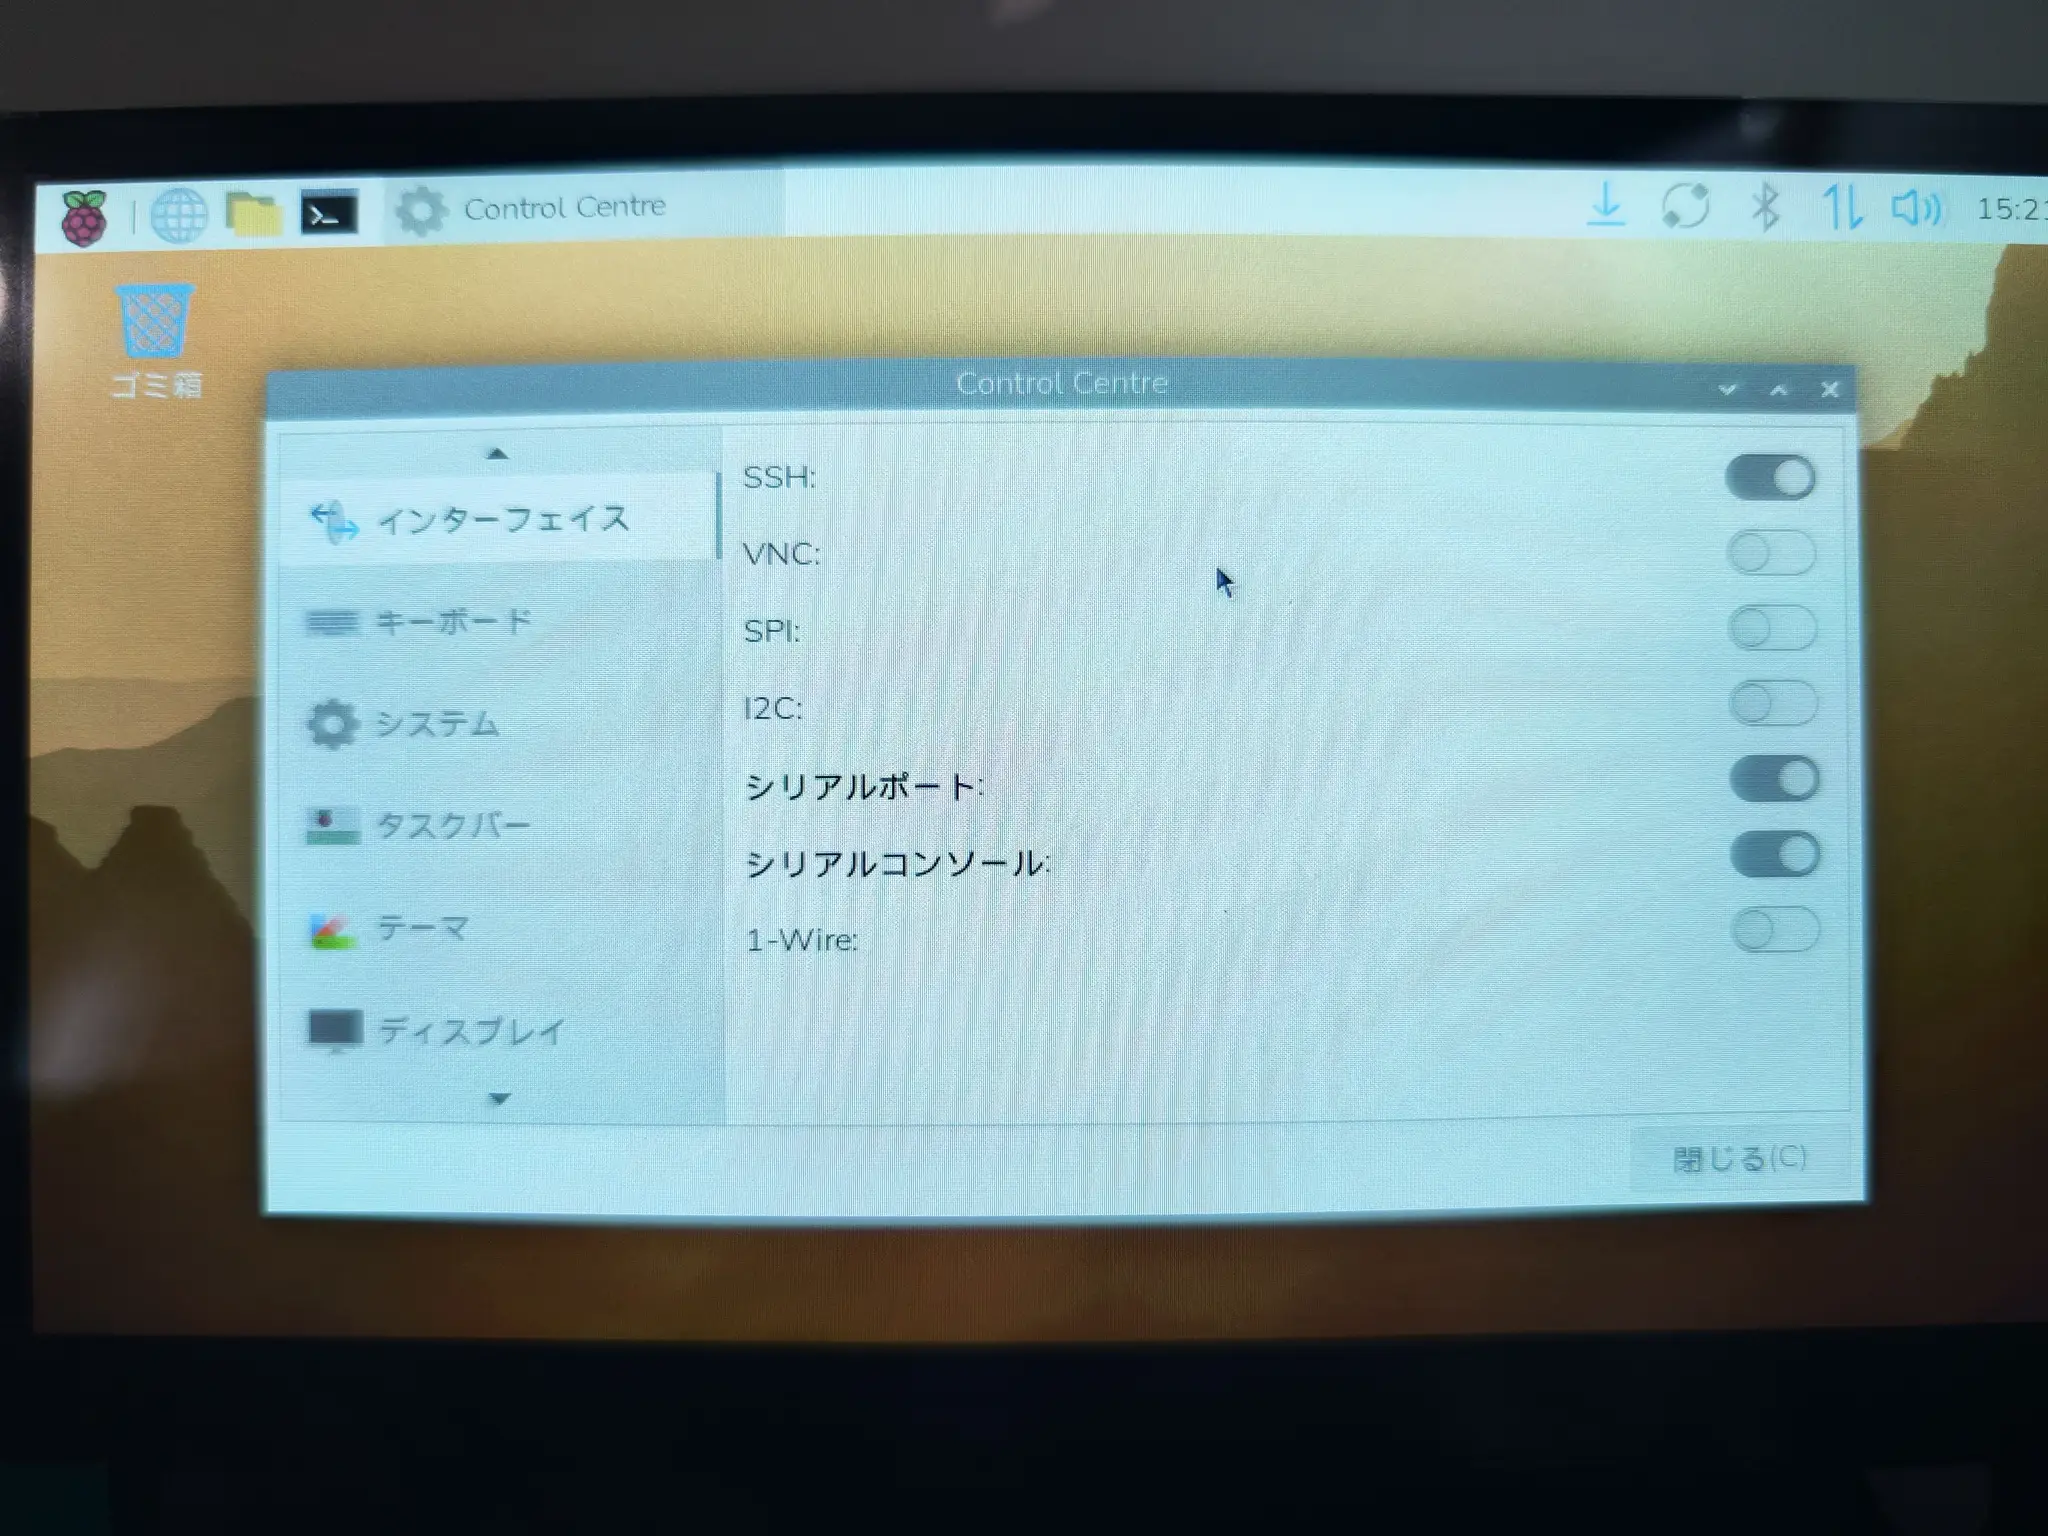
To make the following steps easier, I will first configure the locale and SSH settings.
Locale Settings
Menu bar → Raspberry Pi → Preference → Control Centre → Localization
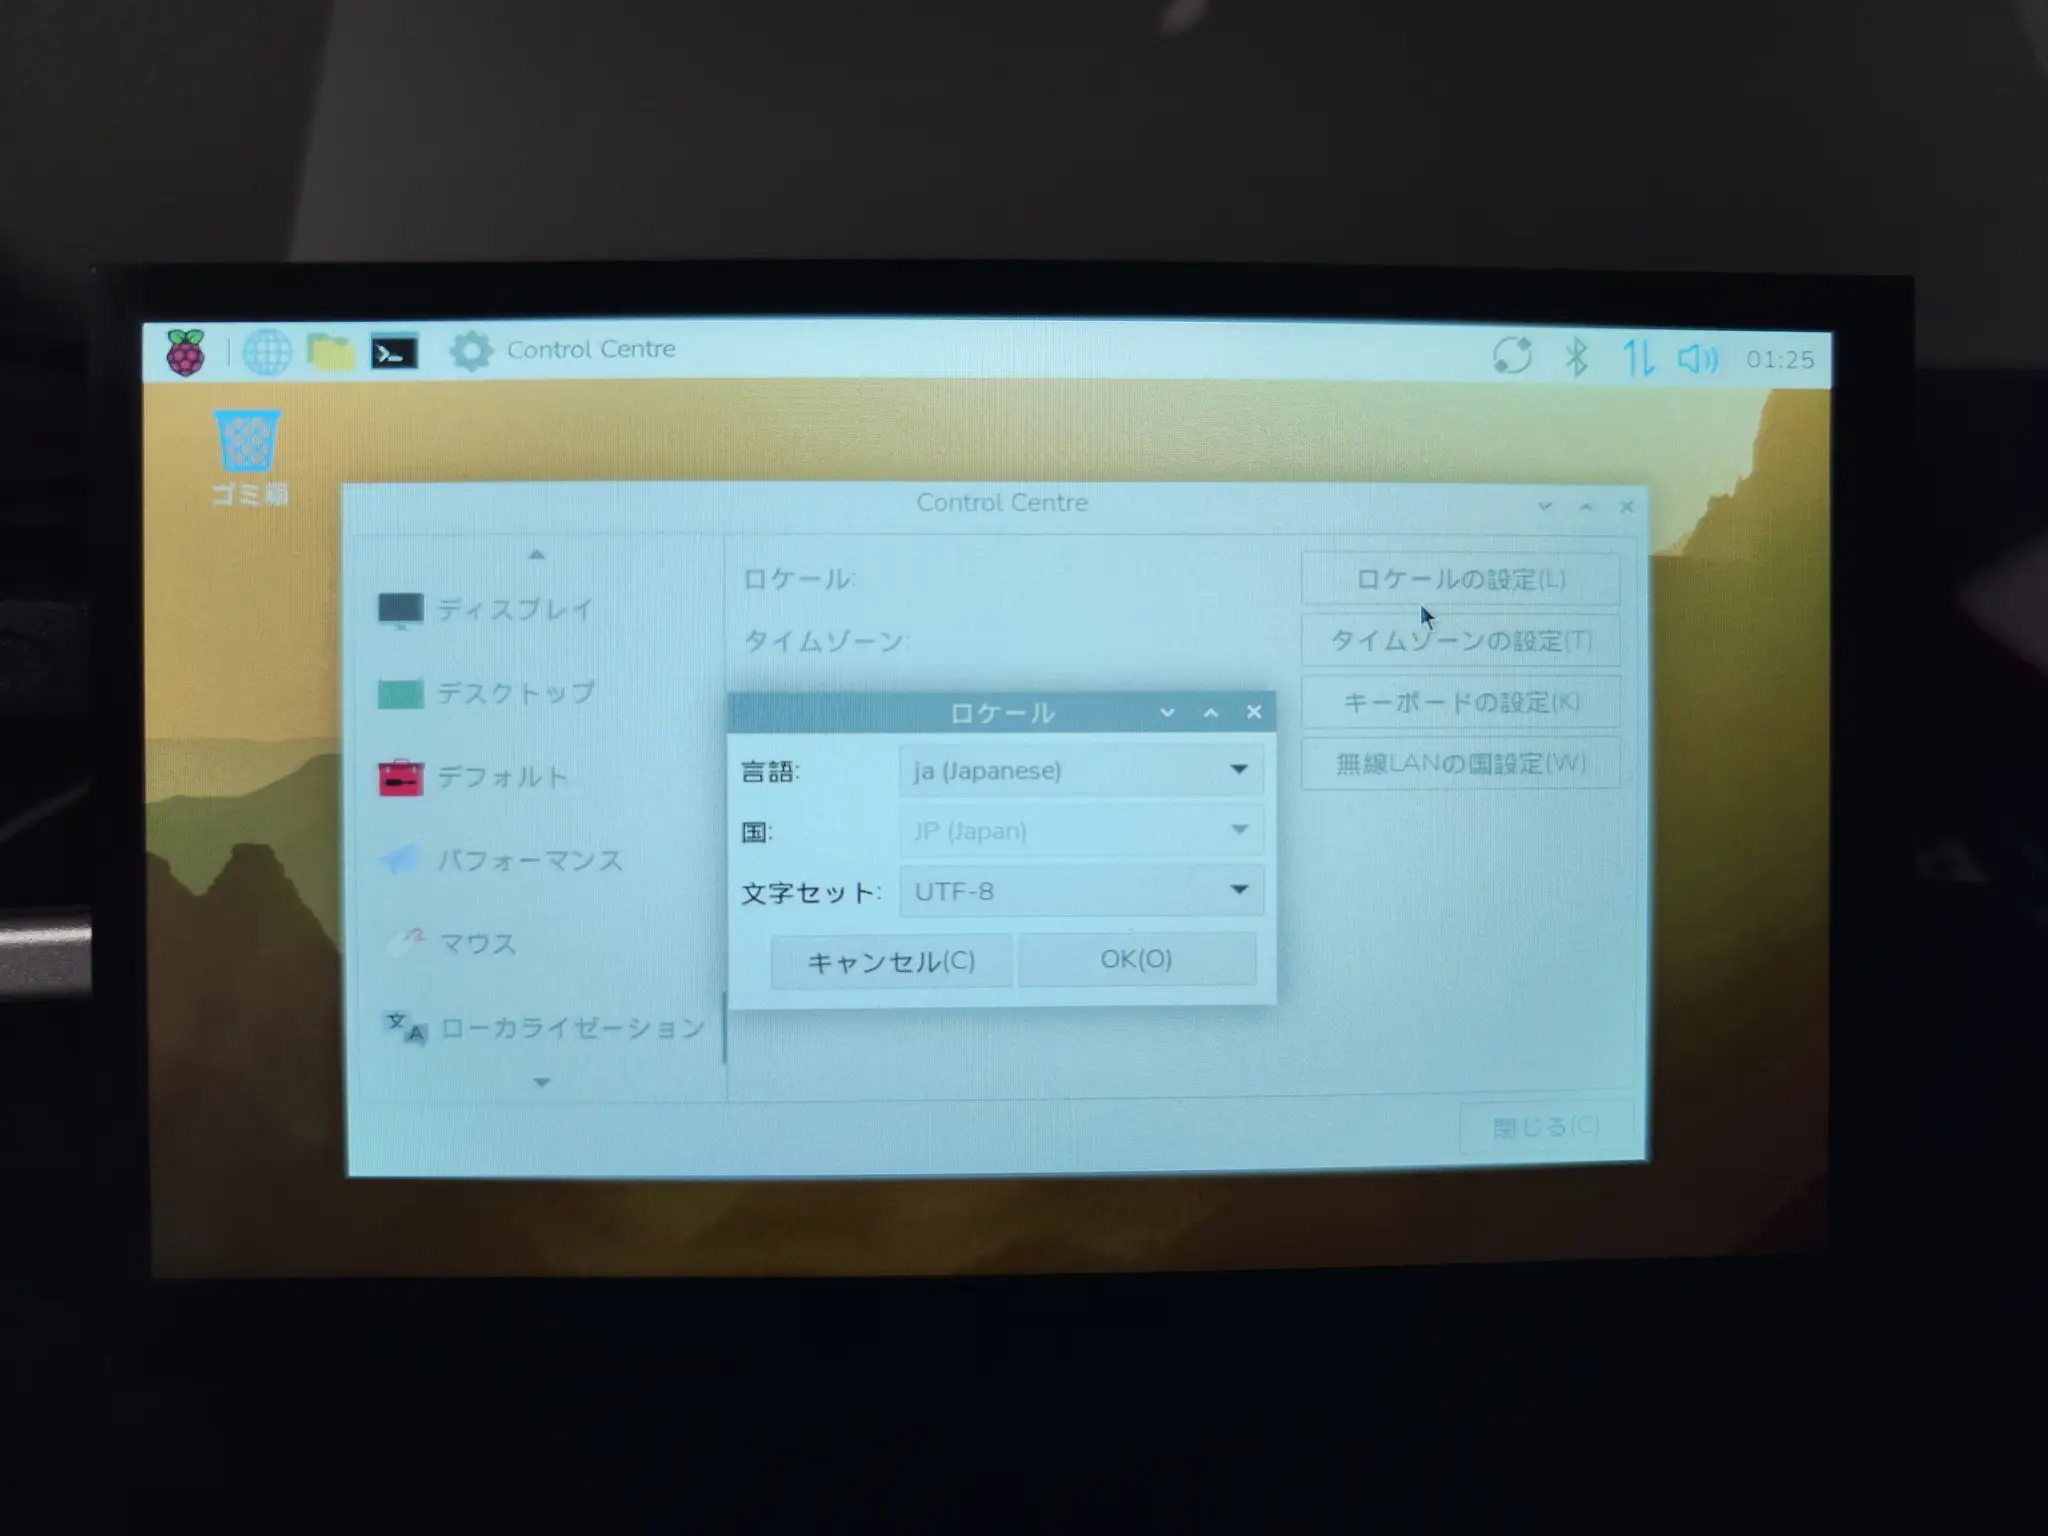
SSH Settings
Menu bar → Raspberry Pi → Preference → Control Centre → Interface
🔒 Trying an SSH Connection
After configuring the locale and SSH settings, restart the Raspberry Pi and check whether you can connect to it via SSH from your work PC.
Open Command Prompt or a terminal, and enter the following command.
ssh your-ID@hostnameIf you can log in as shown below, the connection is working.
C:\Users>ssh pochomlab@pichom
pochomlab@pichom's password:
Linux pichom 6.12.75+rpt-rpi-v8 #1 SMP PREEMPT Debian 1:6.12.75-1+rpt1 (2026-03-11) aarch64

The programs included with the Debian GNU/Linux system are free software;
the exact distribution terms for each program are described in the
individual files in /usr/share/doc/*/copyright.

Debian GNU/Linux comes with ABSOLUTELY NO WARRANTY, to the extent
permitted by applicable law.
Last login: Wed Apr 22 15:55:54 2026 from fe80::9b11:2230:a7f6:ed25%eth0
pochomlab@pichom:~ $
On the first connection, you will be asked whether you want to trust and register this destination. If there is no problem, enter yes.
C:\Users\>ssh pochomlab@pichom
The authenticity of host 'pichom (192.168.68.63)' can't be established.
ED25519 key fingerprint is SHA256:oOOooOooOooOOOOOoooOOoOooOOOooOooOoOooOoOoo.
This key is not known by any other names.
Are you sure you want to continue connecting (yes/no/[fingerprint])?
Once connected, it is also useful to try a few basic commands.
$ whoami
pochomlab
$ hostname
pichom$ pwd
/home/pochomlabThe following commands are also useful for the first round of checks.
uname -a→ Check the OS and kernelip a→ Check the IP addressdf -h→ Check available storage spacefree -h→ Check memory usage
⬆️ Updating Package Information
Next, update the available package information.
$ sudo apt update$ sudo apt upgrade -yUpdating at this stage helps reduce trouble when installing additional packages later.
💻Setting Up Remote Desktop Connection
Next, I will set up remote desktop access using xrdp.
First, install xrdp from the terminal.
$ sudo apt-get install xrdpAfter the installation, reboot once.
$ sudo rebootAfter rebooting, check whether xrdp is running.
$ sudo systemctl status xrdpraspi-config Settings
Next, open raspi-config.
$ sudo raspi-configSelect Display Options.
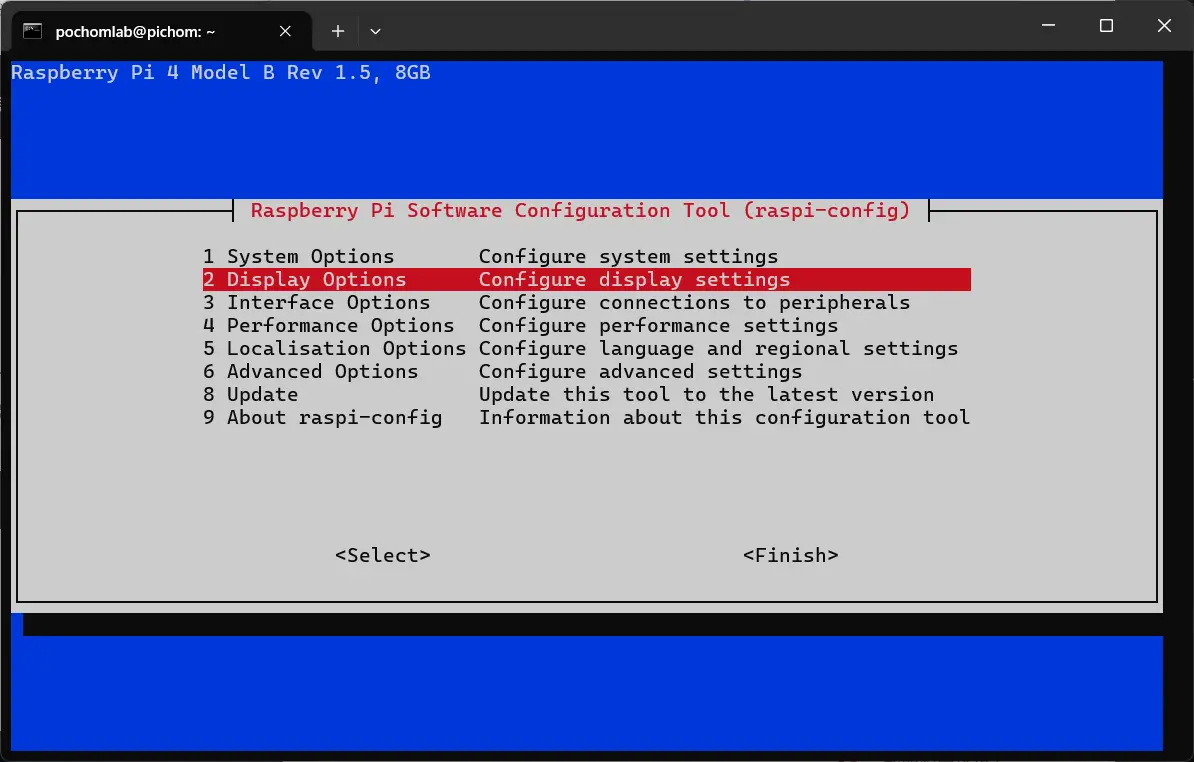
Then select Screen Blanking.
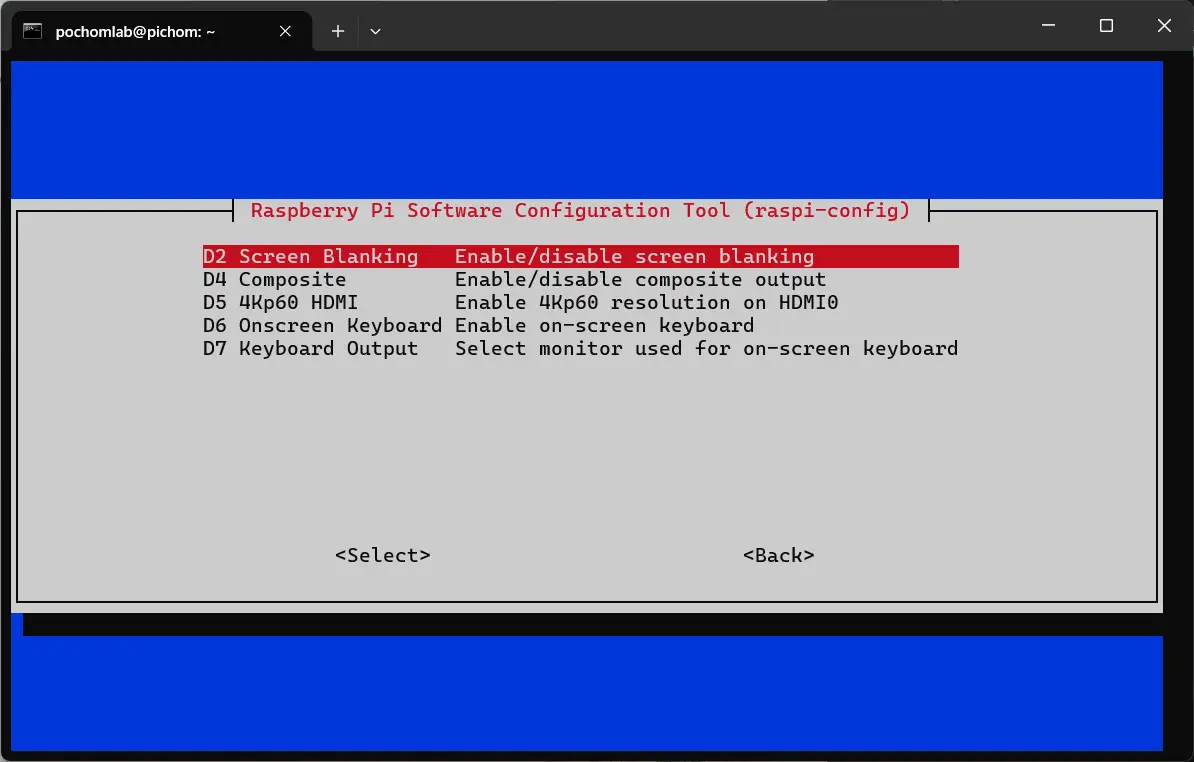
You will be asked whether to enable Screen Blanking. Here, select Yes to enable it.
From what I found during this setup, if this setting is not enabled, the Raspberry Pi may stop accepting input on the local side.
For that reason, I continued with this setting enabled.
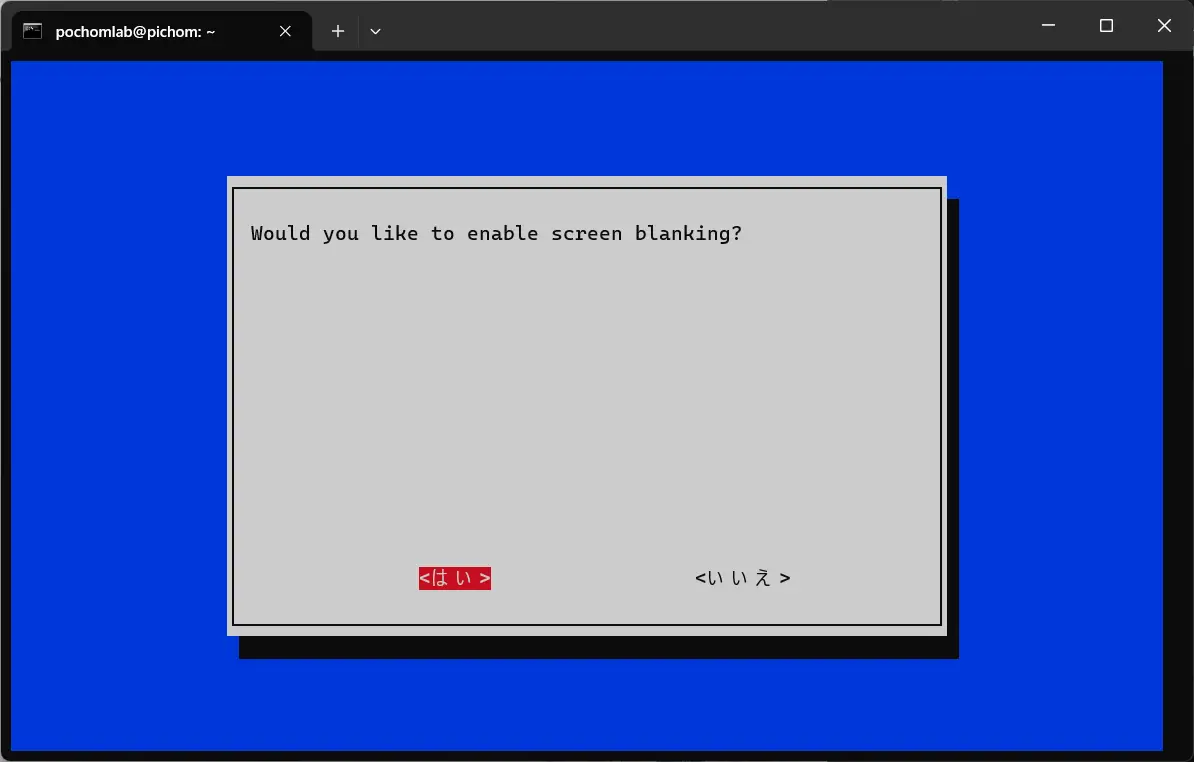
After changing the setting, reboot again.
$ sudo rebootConnection Test
First, log out from the local GUI session on the Raspberry Pi.
Then launch Remote Desktop on Windows.
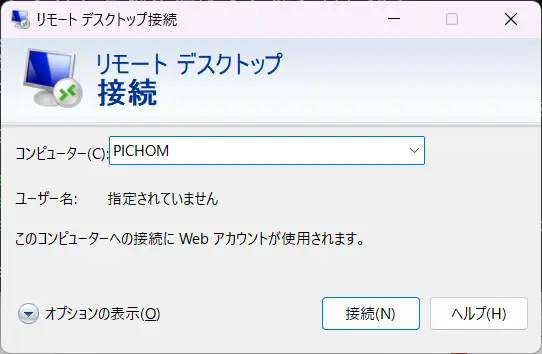
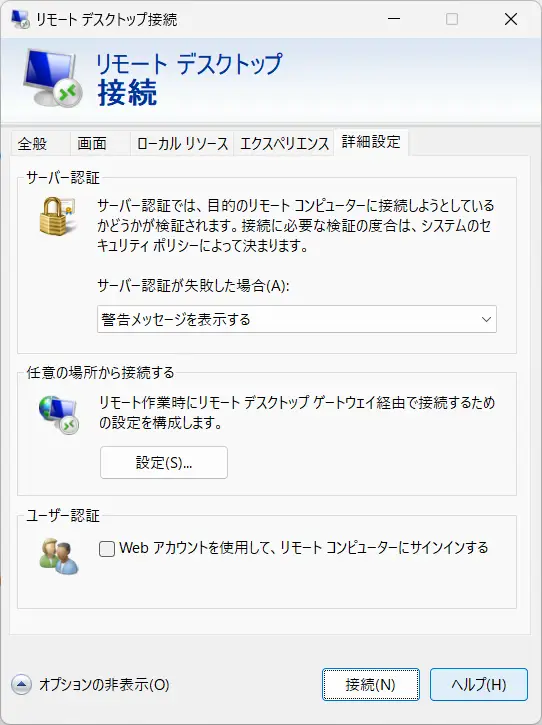
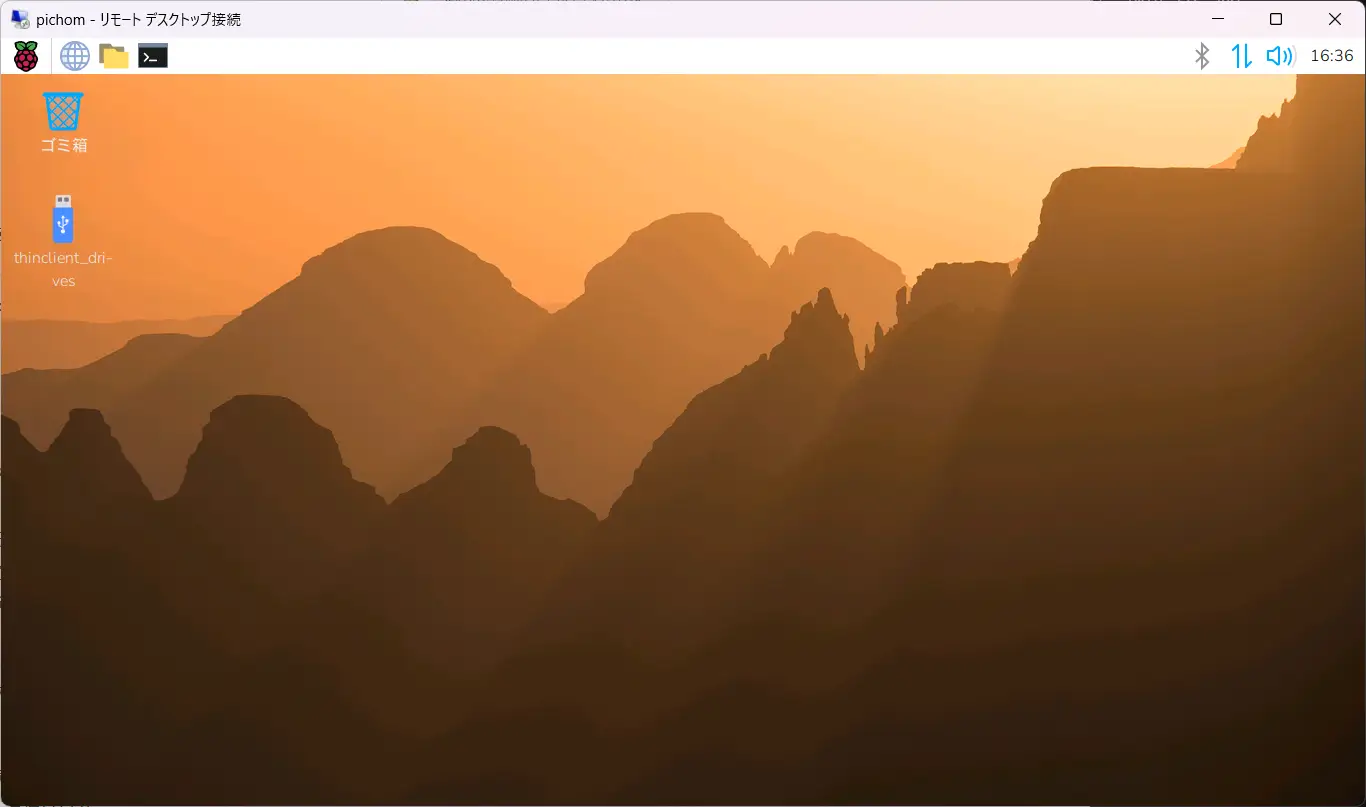
Open “Show Options” → “Advanced”, and make sure that Use a web account to sign in to the remote computer is turned off.
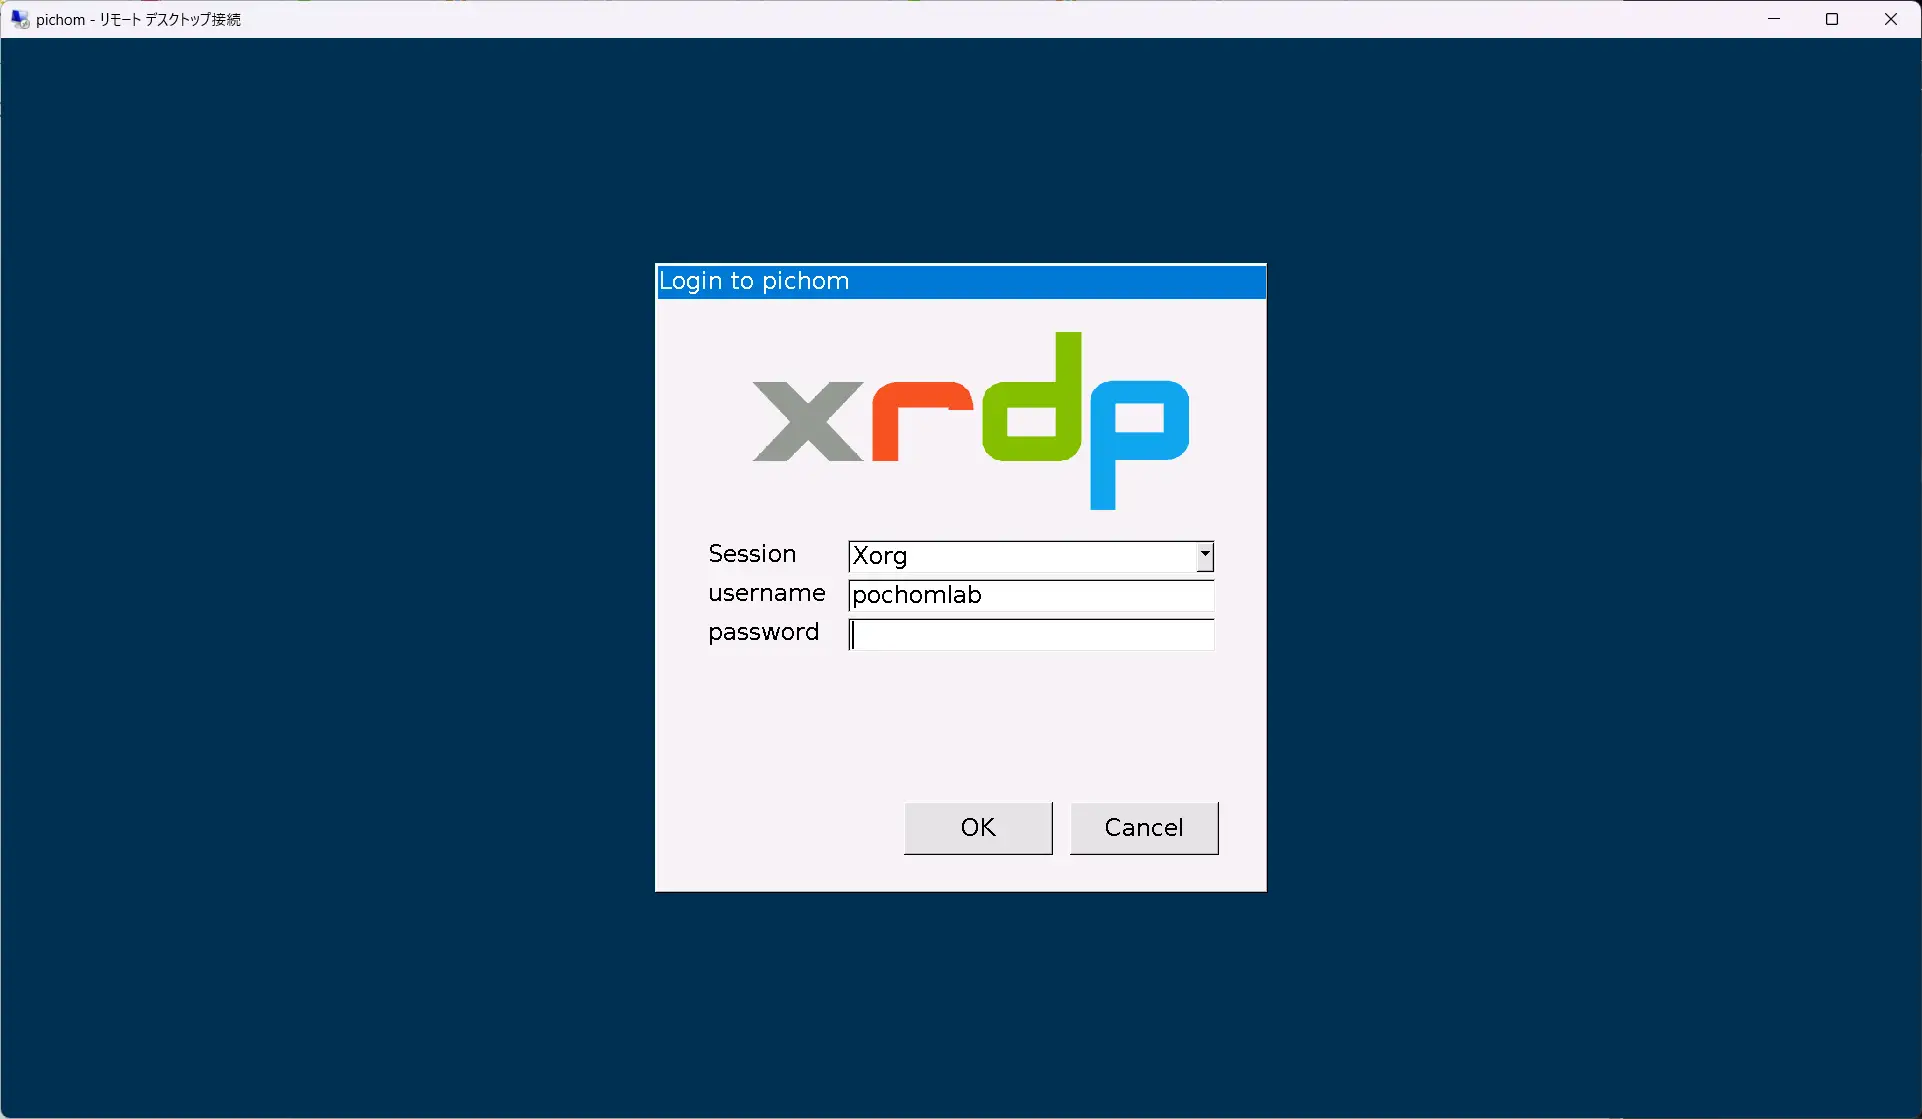
If you can connect without any problems, the setup is complete.
📺 HDMI Settings
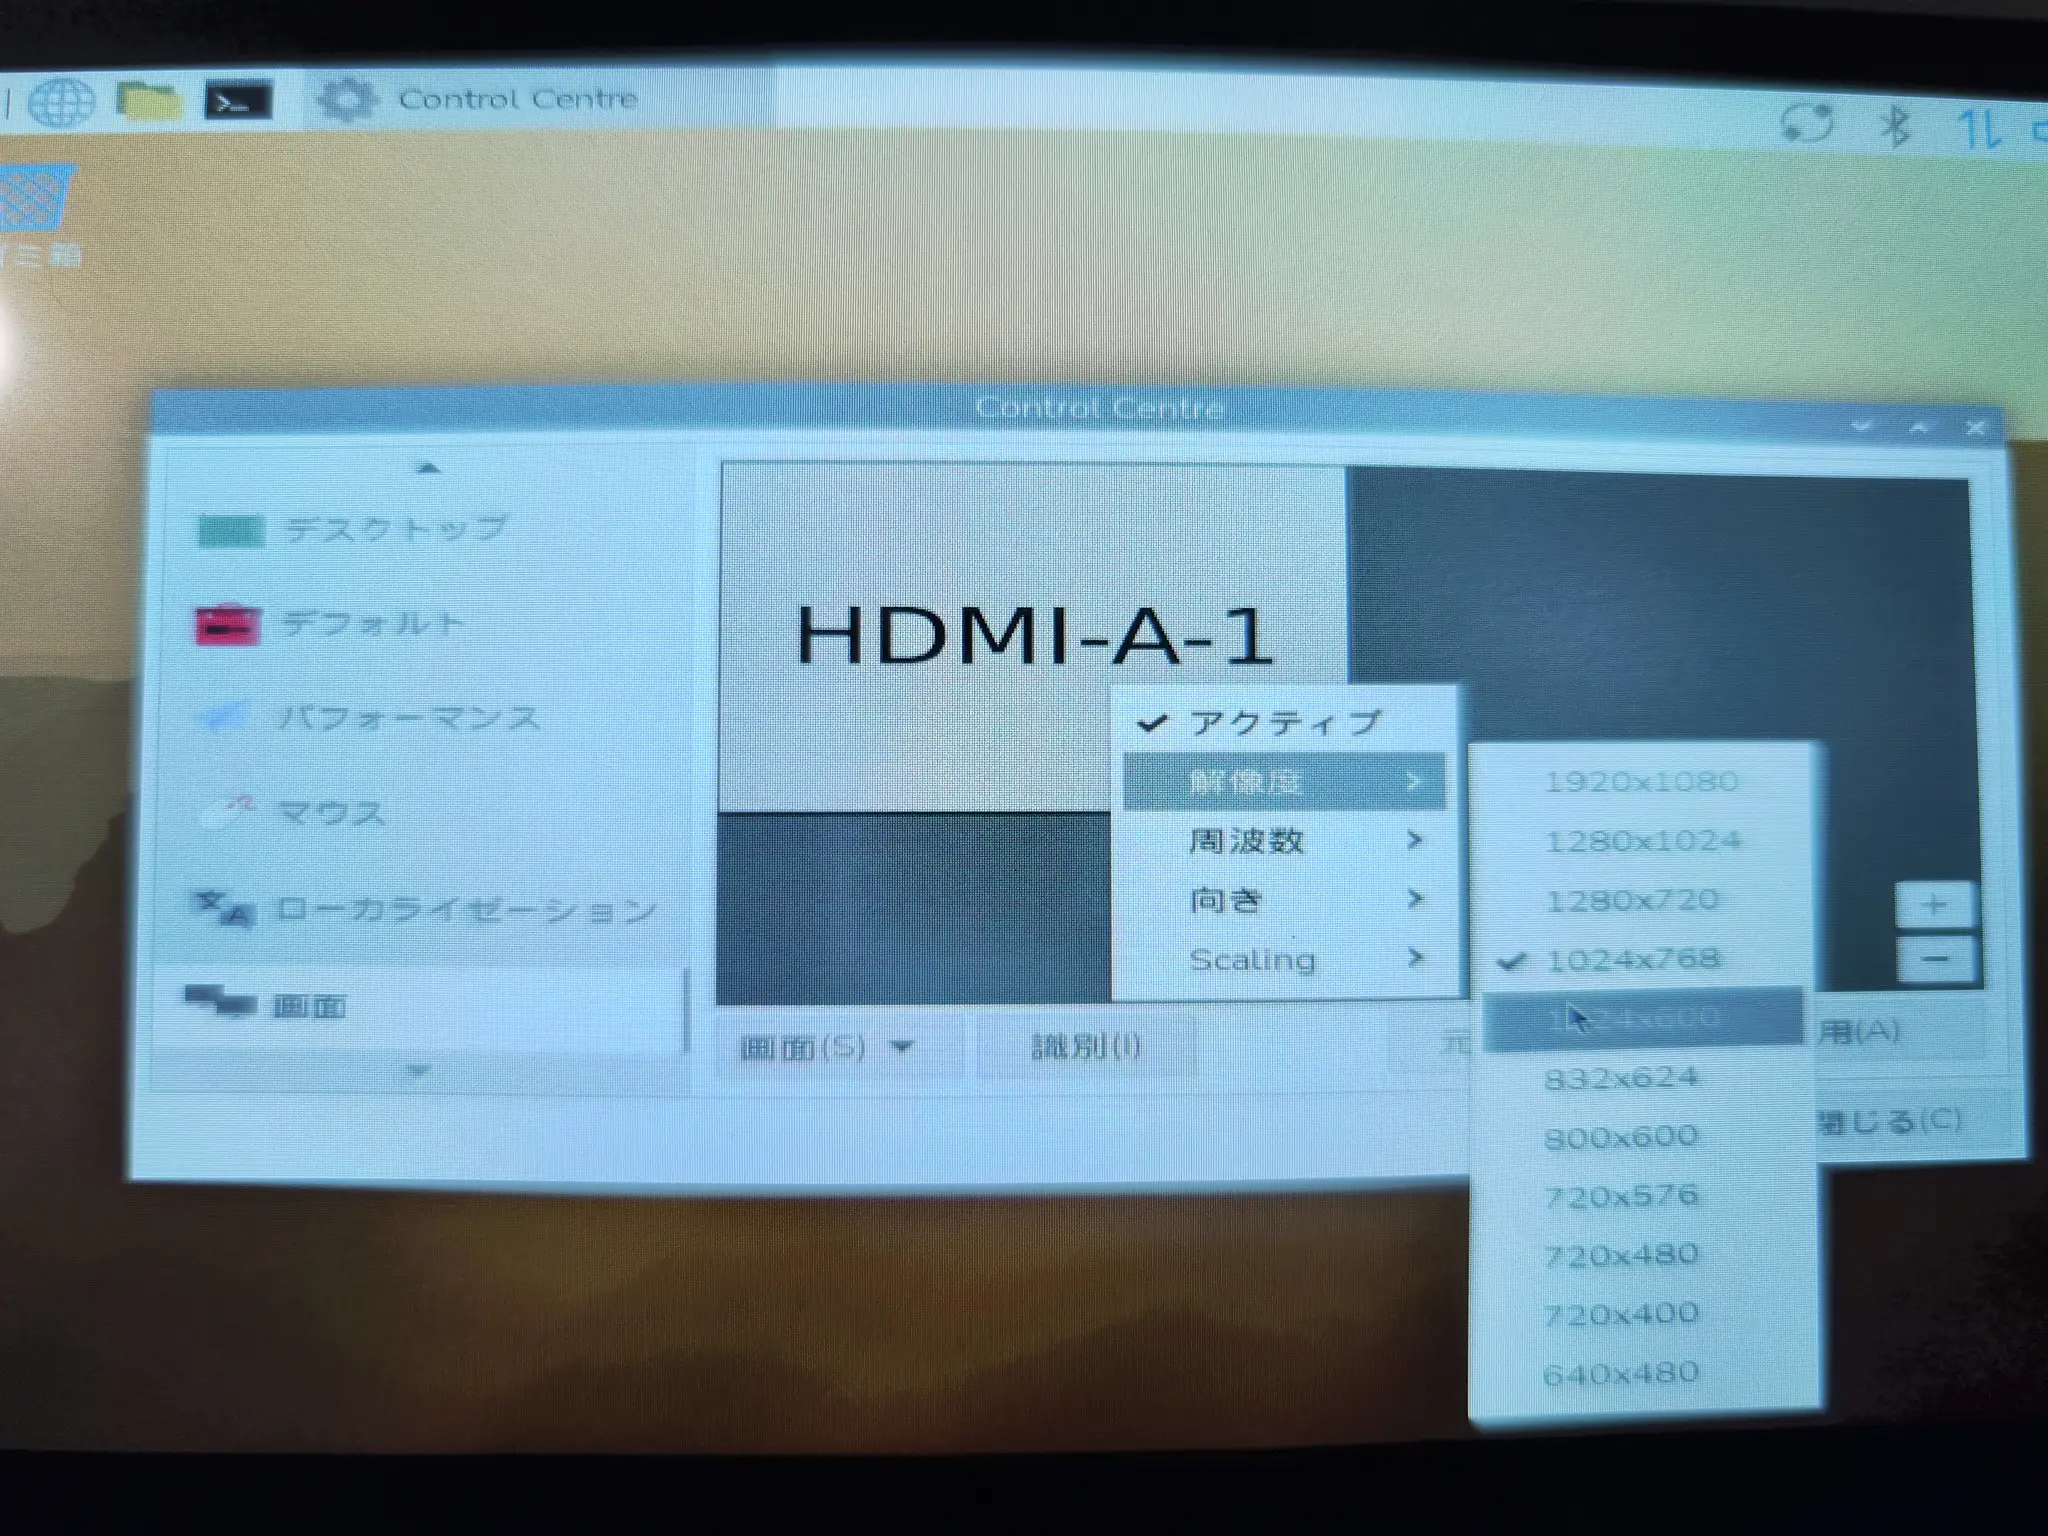
The HDMI connection on the Raspberry Pi still seems to have some issues when left to automatic detection, so I added settings to the config file.
With the Santek 7-inch monitor used this time, the resolution was recognized as 1024 × 768, which made the display look vertically squashed.
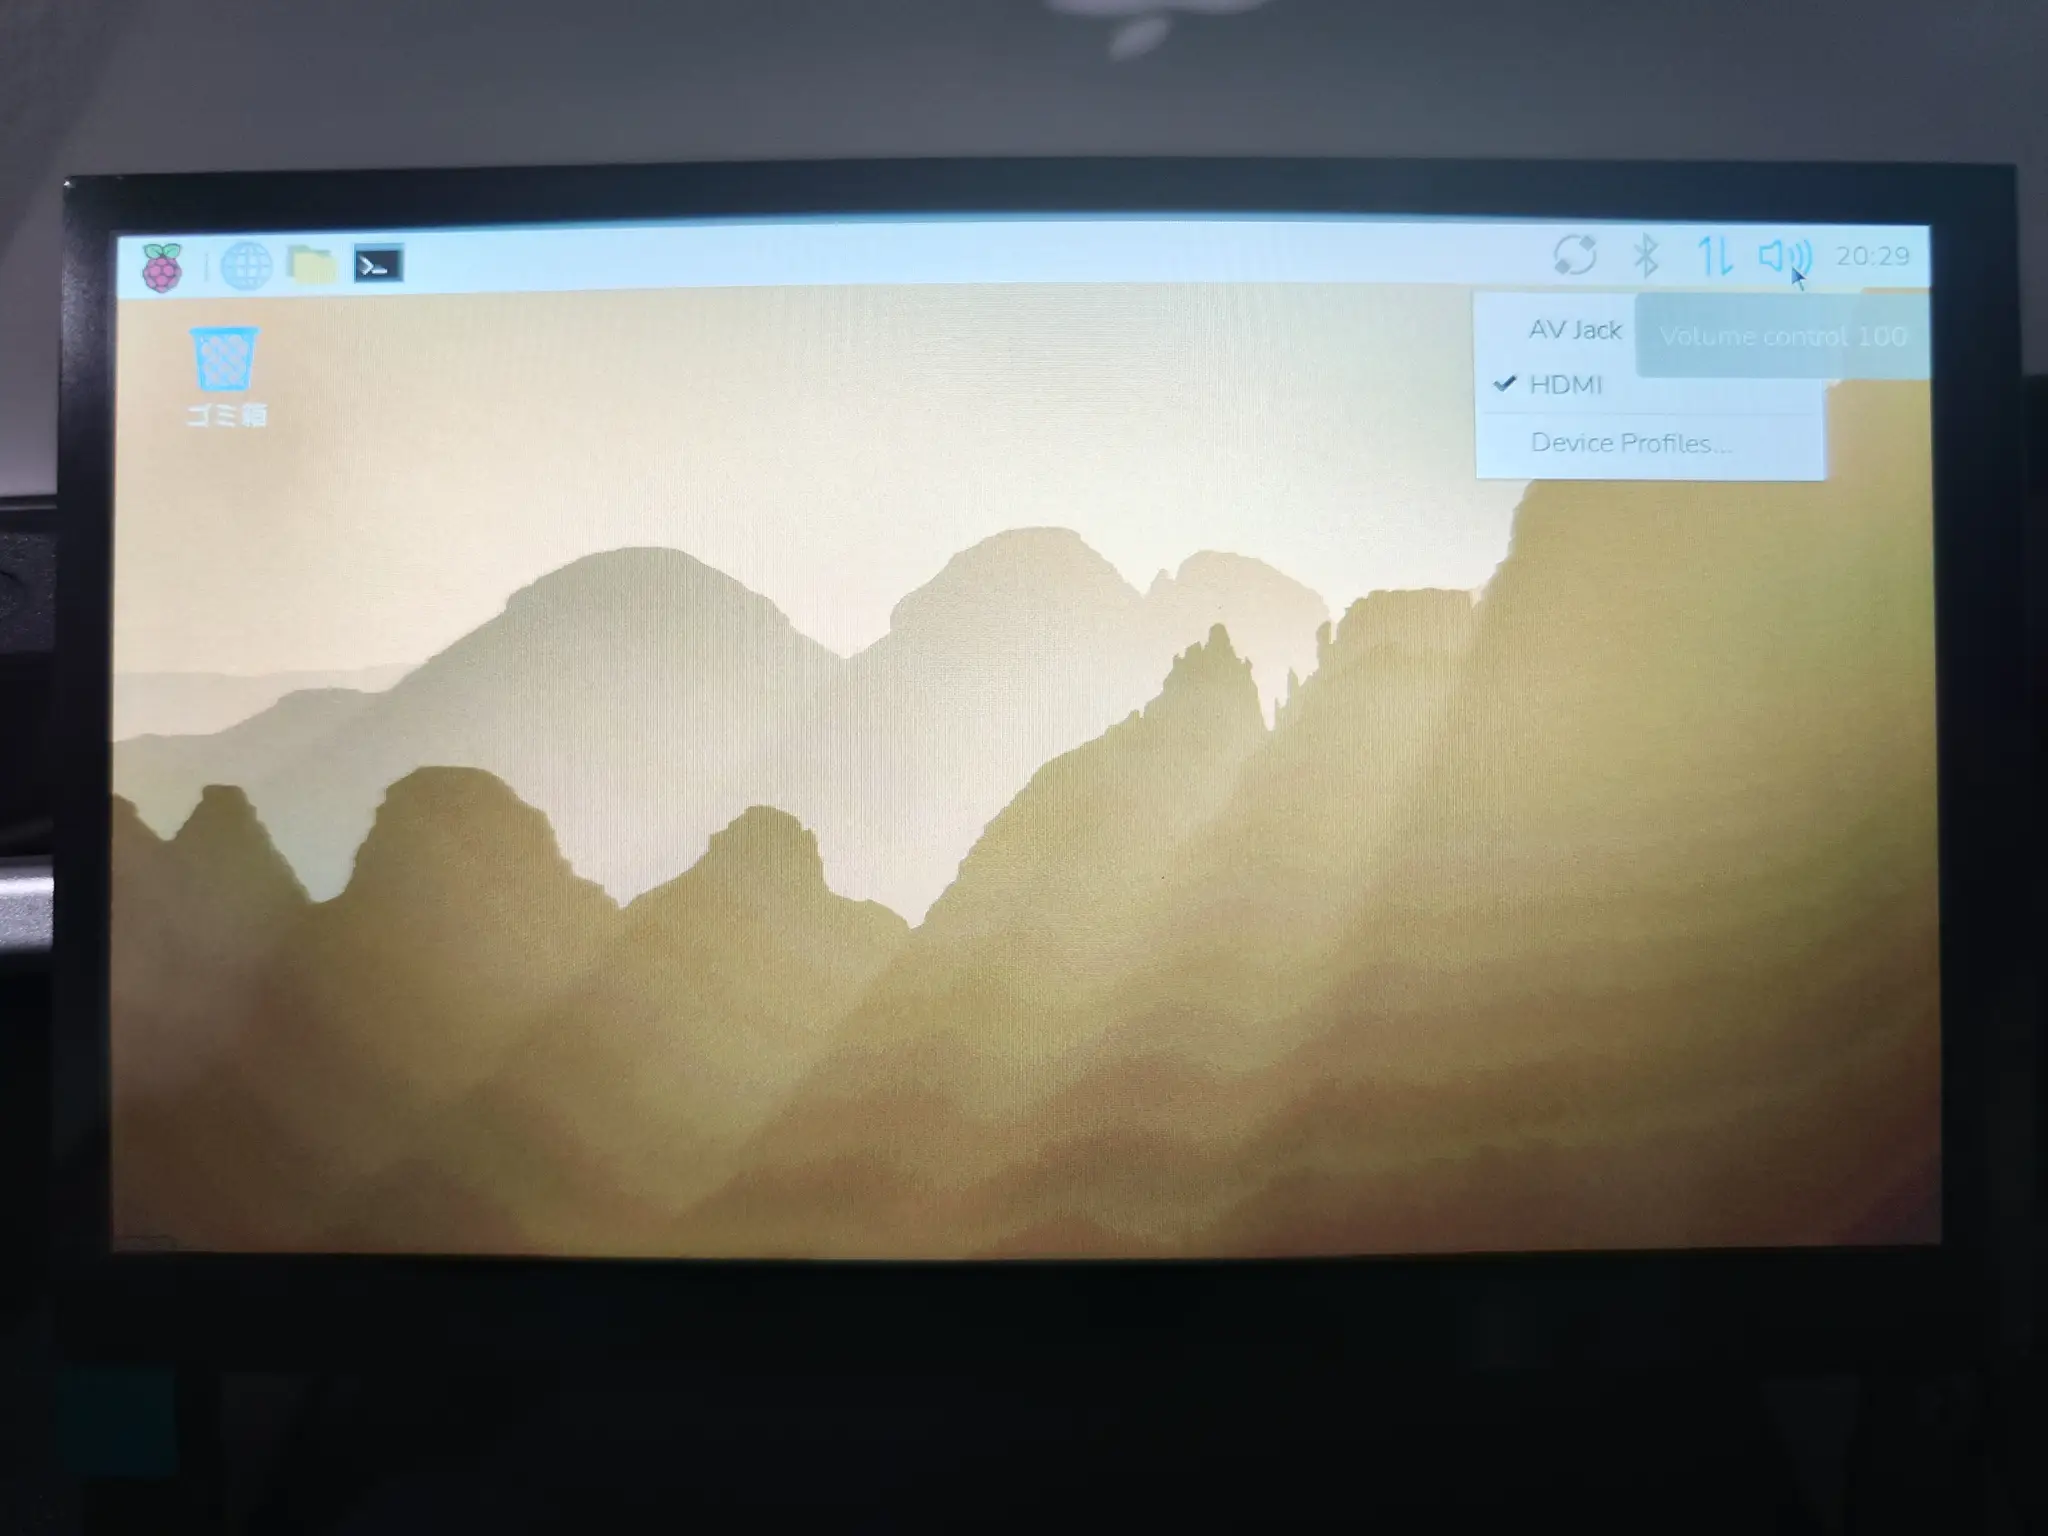
There was also a situation where audio worked with speaker-test, but media players and browsers did not output audio through HDMI.
Use the following command for the speaker test.
$ speaker-test -c 2 -t wavOpen the configuration file.
$ sudo nano /boot/firmware/config.txtAdd the following lines to the end of the file.
hdmi_group=2
hdmi_mode=87
hdmi_cvt=1024 600 60 6 0 0 0
After adding them:
- Press
Ctrl + Oto save - Press
Enter - Press
Ctrl + Xto exit
Then reboot.
After rebooting, if the correct resolution can be selected, and if the previously grayed-out HDMI output becomes selectable when right-clicking the sound icon in the upper-right menu bar, the setup is successful.
✍️ Summary
This time, as the initial setup for Raspberry Pi 4, I enabled locale and SSH settings, updated package information, set up remote desktop access with xrdp, and adjusted HDMI resolution and audio settings.
Once this much is prepared, the Raspberry Pi becomes much easier to use as a foundation for future program development, communication tests with a local LLM, and various hardware and software checks.
The Raspberry Pi 4 does produce a fair amount of heat, but with this setup, it seems usable without a fan, at least for ordinary testing and verification work.
Next time, I will move on to editing Raspberry Pi from VS Code on the work PC via SSH.